Fat Quarter Project

 A FAT QUARTER PROJECT

PLACEMAT SETTING 


Here is the Fat Quarters package that was purchased from Amazon to which I made this Placemat Setting from.

ShuanShuo Coffer Series Cotton Fabric Quilting Patchwork Fabric Fat Quarter Bundles Fabric for Sewing DIY Crafts Handmade Bags15"X19" 7pcs/lot (Lake Blue)


Also the following batting was used which was purchased from Gibbons Company :

Warm Company 45-Inch by 60-Inch Warm and White Cotton Batting, Crib Size


I also had the opportunity of trying my new serger out in this project which was recently purchased at Sew Vac Direct with brand Elna. 

It is a very user-friendly serger and very comfortable.  It's really my first time for sergering but I seem to get on with it just as if it is my sewing machine.   I have been wanting a serger for years and finally got one.  It may not be like the big time ones out there with the automatic threading and all, but I like it and very pleased with it.   Someday, maybe I experience the more advance automatic, but this one is okay for now and am grateful.  Thank you Sew Vac Direct Elna thank you too for thinking of the beginners with a small pocket book. 

Elna Elnita ES4 Serger 

https://www.sewvacdirect.com/elna-elnita-es4-serger/


Laptop Case

 LAPTOP CASE 


Front with pouch pocket. 


Front with pouch pocket.

Back


Front

Laptop, Cellphone And Eyeglass Cases


Instead of Laptop, place books, Cellphone And Eyeglass Cases

Laptop pouch pocket showing


Showing front and back

Showing front and back

Showing inside the laptop case

Showing inside the laptop case

Showing inside the laptop

This project was made in mind for the purpose of season of going back to school as school for many had just started in September 2020. 

The laptop was made from various fabrics of fat quarters.

Items needed to make this Laptop:-

Fat Quarters (3 different fabrics) (1/4 yard fabric)
Thread
Scissors
Fusible Interfacings 
Tape Measure, Ruler, And Paper
Cut piece of paper to measure the size of your laptop to act as the pattern.  Along with a piece to represent the pouch pocket as a pattern (optional).   Example:  Laptop 15 1/2 x 10 1/2  inches (1/4 inch seam allowance) Pouch:  4 - 5 inches (1/4 inch seam allowances)
Sewing Machine 

Fabric 
Cut out 1 piece for front.
Cut out 1 piece for back.
Lining
Cut out 1 piece for front lining (inside)
Cut out 1 piece for back lining (inside)
Fusible Interfacing 
Cut out 2 pieces for front and back 


1.    Take front and back and add the fusible interfacing to it on the wrong side of the fabric. 
2.    Pin front and back together at right sides.  Stitch around the entire case leaving the top unstitched.  Snip the corners accordingly. 
3.     Pin front and back together at right sides of lining.  Stitch around the entire case leaving the top unstitched. Also, leave an opening on the side to enable turning the case inside out. 
4.    In both 2 and 3 optional zigzag  or serge all edges.  
5.    Turn casing inside out and shape all corners accordingly. Press
6.    Take and meet by placing the casing inside the lining with right sides matching at side seams.
7.    Stitch along the top. Press
8.    Take the side opening in the lining and pull the casing through.   Either slip stitch or machine straight stitch to seal the open hole.  Form into the laptop case being careful to shape corners.  Press.  

Optional:  If you like the pouch pocket add it prior to number 2 by placing it at the bottom of the casing in front.   Be sure to turn in the top portion of the pouch pocket and then top stitch before attaching.  You can also use the lining effect too here along with the fusible interfacing and top stitch.

Option:
If you like you can turn the Laptop Case inside out and use the lining as the outer interior.  


Laptop Case https://sewingquiltingbyshirleyann.blogspot.com/ #quilting #sewing Sewing Market

Posted by Shirley-Ann Pearman on Saturday, September 19, 2020

Eyeglass Case Or Cellphone Case


Simplicity 5606 | Fat Quarter Club | Bags And Accessories 

"E" Eye-glasses or Cellphone Case

I just recently completed this pattern "E" Eye-glasses or Cellphone Case with fabric purchased in Fat Quarters.  It is amazing how much exactly can be made out of Fat Quarters, as I am used to purchasing fabric by the yards mostly for dressmaking, but here lately I have been using some Fat Quarter for projects.

To make it I followed the instructions to the pattern, but didn't do the portion of adding a tab. 

To make it you will need:

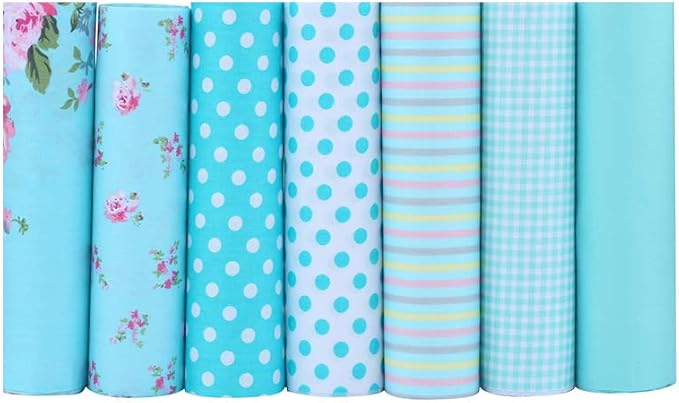
Fat Quarters:  one for outside; one for lining, one each of two different fabrics for patches. 

Polyester Fleece:  1/2 yard 

Pattern Simplicity 5606 for instructions.   Note I can't make a copy for you because of Copyright rules and regulations.  

Here is somewhat my paraphrasing in my words to which I hope will be clear for comprehension purposes, because I am not necessarily a pattern writer or designer.

1.    Cut out pattern "E" Eyeglasses or Cellphone Case.

2.    Lay on your choices of fabric and pin. Cut out.  Also, cut out the polyester fleece too.

3.    Iron on the polyester fleece to the cut out casing pattern.

4.    Bast all section with the circular areas.  If you like, you can also bast the 1/4 inch seam allowances to help out with accuracy.  Slit or clip threads and remove the pattern. 

5.    To do the patchwork, pin and stitch the 1/4 inch seams accordingly.  Press. 

6.    Cut out the patchwork pattern to this pattern on the polyester fleece.  Press it to number 4 above. Trimming any excess fleece.  Optional:  Do quilt work on patchwork. 

7.    Take number 4 above which is the casing pattern and stitch along all sides, being careful to pivot on the corners notations.  Press accordingly.  Turn inside out. Press.

8.    Do the same as the casing of number 7 for the lining.  However, make a notation to leave a open area unstitched of approximately 2 - 3 inches. 

9.    Put number 7 inside of number 8 matching right sides of fabric together with notches and seams.   Bast and stitch along with a 1/4 inch seam allowance.  Press.

10     The open area on the lining of number 8 take and pull the casing through to show the casing and the lining.  Being careful to form all corners neatly.  Press.  Either slip stitch or hem stitch the open area or machine top stitches.  Press

11.    Take the lining and insert into the casing to form the lining.  Press.

After completing and pressing, I discovered that I can also fold or cuff the patchwork area to make it all look the same colour without showing the patchwork.  Almost, like wearing on the reversible.  

Unfortunately, while doing this I didn't take the pictures at every step like I have done in previous blog postings. 


Some Projects Of Sewing Using Burton + Burton Ribbon

    Some Projects Of Sewing Using  Burton + Burton Ribbon Mug Mats Place Mat  Wash Towels For Show https://vm.tiktok.com/ZMMQSu3HH/ https:/...